The tournament creation process is broken into three segments.
- Game and Organization (if you are a member of multiple ones) Selection
- Selecting Tournament Settings
- (Optional) Manual Phase Setup
Game and Organization Selection
The first page asks you to select which organization and game you’ll be creating a tournament for. These selections can not be edited once a tournament is created as they impact future features, game-related options, as well as unique pairing and standing algorithms.
Selecting Tournament Settings: Tournament Edit Page
The Tournament Edit page is expansive, offering many unique options, though only a handful of settings must be selected before moving onto the next segment.
- Name: The name of the tournament that will be displayed to your players.
- Tournament Type: Depending if the tournament will be played digitally, on a tabletop, or choose “Player List Only” if no matches will be paired in Melee.
- Tournament Location: Physical address of the tournament.
- Tournament Structure: Choose if the phase setup should be Swiss Only, Swiss Plus Top or Custom.
- Tournament Start Date: What time the tournament starts and when registration closes for players (unless you set up the registration end date separately).
- Player Registration: Determines if the tournament is open to all, has an entry fee, or is invite only.
Everything else on the tournament edit page is optional.
Once you are finished you can click “Create Tournament” which will give you access to the Tournament Controller and the last section of tournament creation. Here you will see a list of tabs on the left side which act as unique pages for control over your tournament.
Selecting Tournament Structure: Phases
You must create at least one Phase as they are how you tell Melee how you want your tournament to operate. ALL phases are editable after the fact, allowing you to change the number of rounds once you have a final player count.
Swiss Only:
If Swiss Only was chosen as the Tournament Structure, the system will automatically create one swiss phase, with the specified number of rounds.
Swiss Plus Top Cut:
This Tournament Structure will generate two phases, one swiss and one playoffs phase. They cannot be edited, as doing so will switch the Tournament Structure to Custom. The number of rounds will automatically adjust at the moment of pairing round one, based on the final number of participating active players.
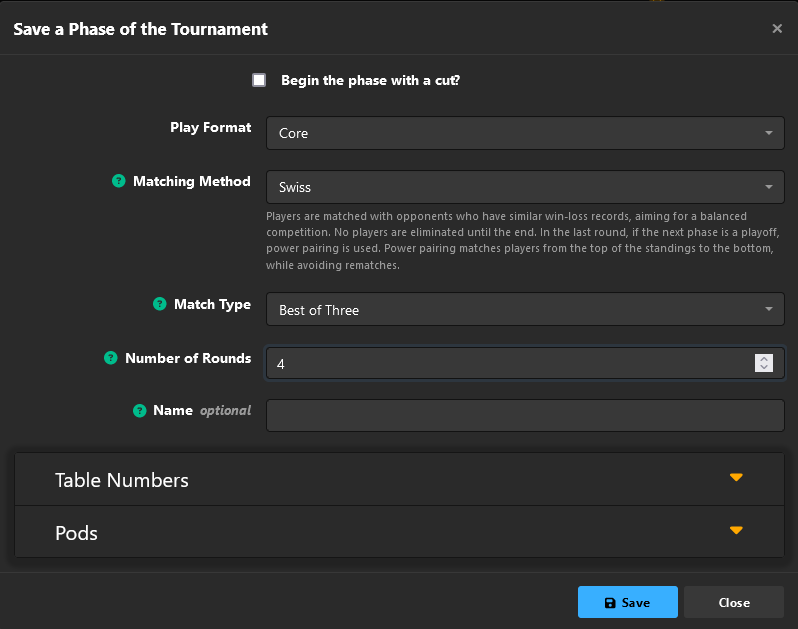
Custom Phase Setups:
Swiss Only Phase Settings
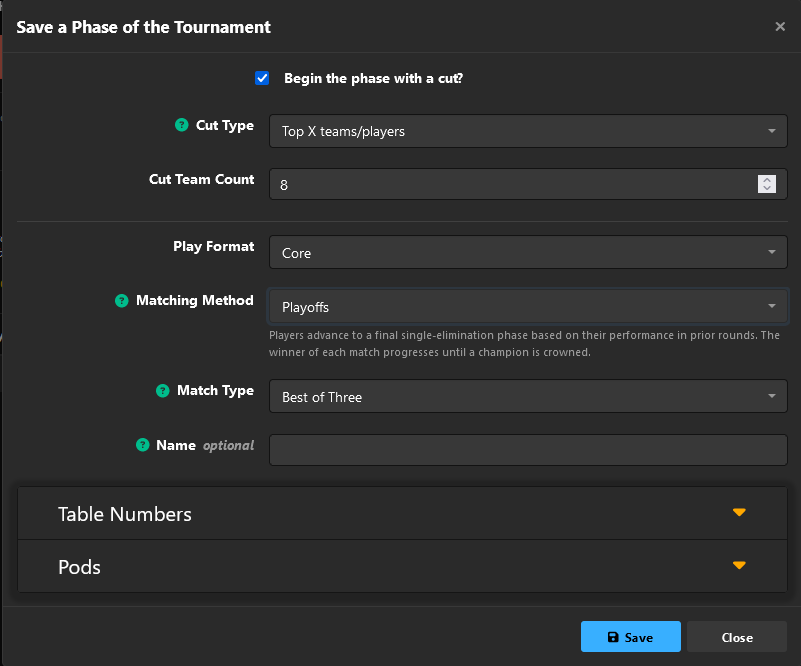
To Add a Top Cut Make a Second Phase
To Make The Tournament a Draft

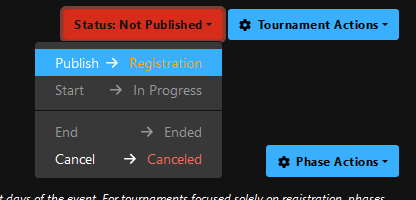
Last Step: Publish
Once you have at least one Phase you can go to the upper right-hand corner and publish the tournament to start registration.
Next Steps: